Rental Yard Layout: Storage, Flow and Loading
An optimized rental yard layout directly boosts operational efficiency. It also increases customer satisfaction and overall business profitability. When equipment, delivery trucks, and staff move smoothly, wait times drop quickly. Furthermore, equipment turnover rates improve, and maintenance routines run much faster. In contrast, a poorly planned yard creates bad bottlenecks. As a result, it increases equipment damage and causes costly workplace accidents.
Designing a great layout requires balancing three main operational zones. These include your equipment storage layout, rental warehouse organisation, and loading area design. Therefore, you must establish clear traffic paths first. Next, organize your inventory by demand speed. Finally, safety-proof your dispatch zones.
Consequently, your rental business can maximize usable space while keeping everyone safe and productive. These operational improvements are particularly important when establishing an equipment rental business that depends on efficient fleet utilization and reliable customer service.
The Core Principles of an Efficient Rental Yard Layout
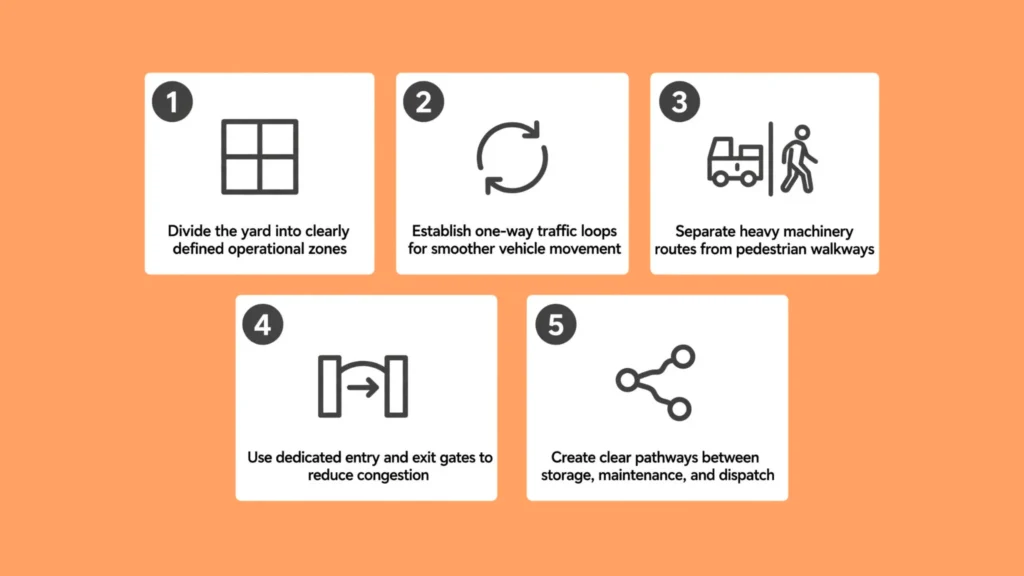
A well-structured rental yard functions just like a busy logistics hub. However, you should never treat your open lot as a free-for-all parking space. Instead, high-performing yards divide their footprint into clearly marked functional zones. Every square foot must serve a clear purpose. Because of this layout, machinery moves seamlessly from check-in to maintenance, storage, and dispatch.
Understanding Operational Traffic Flow
Traffic flow forms the exact foundation of good yard organization. Meanwhile, several types of movement happen at the exact same time in an active yard. Managing these competing movement patterns is essential for overall safety and speed.
Specifically, the primary movement categories include:
Heavy Commercial Traffic: Flatbed trucks, semi-trailers, and third-party haulers dropping off or picking up heavy machinery.
Customer Pickup Traffic: Standard pickup trucks, commercial vans, and light utility trailers brought in by customers for short-term tool rentals.
Internal Equipment Movement: Forklifts, telehandlers, wheel loaders, and aerial platforms driven by yard staff between service bays and storage slots.
Pedestrian Foot Traffic: Yard technicians, counter staff, service mechanics, and visiting customers walking between the office and storage areas.
To prevent congestion, design your main traffic flow around a single-direction loop system. Always use dedicated one-way entry and exit gates. In addition, drive-through lanes stop haulers from reversing long trailers. Thus, this design choice dramatically cuts down crash rates in busy yards.
Designing Effective Separation Barriers
Mixing walking people with heavy working machinery creates severe safety risks. Fortunately, simple physical separation methods keep personnel and visitors safe without slowing down work.
For example, high-visibility painted walkways, physical bollards, guardrails, and concrete curbs clearly mark permanent walking paths. Moreover, you must always guide visiting customers along designated raised or barricaded paths. As a result, visitors stay completely isolated from active staging bays where forklifts and heavy excavators load onto trailers.
Equipment Storage Layout: Categorization, Velocity, and Access
Your outdoor equipment storage layout dictates how fast staff stage items for pickup. Likewise, it determines how quickly they return machinery to inventory after servicing. A thoughtful storage setup minimizes non-productive drive times across the yard. Additionally, it protects expensive assets from unnecessary wear.
Classifying Assets by Rental Velocity
You should place equipment in designated storage zones based on rental frequency, machine size, and handling needs:
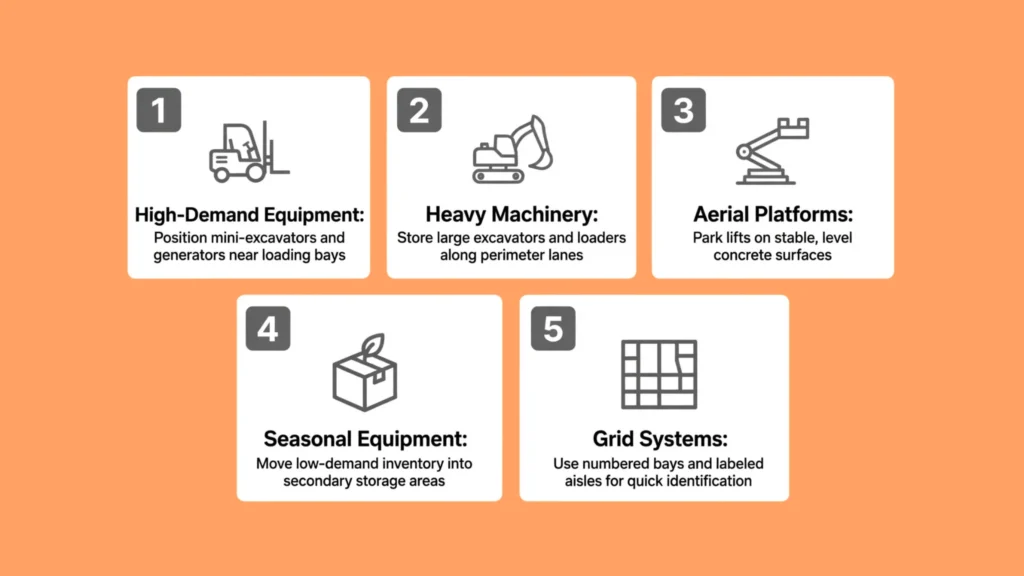
High-Velocity Compact Equipment: Position fast-moving items—such as mini-excavators, skid steers, trenchers, generators, and small compactors—closest to the main loading bays. Storing high-demand equipment near the front reduces travel time for staff preparing daily dispatches.
Heavy Construction Equipment: Arrange larger machinery with slower turnover—such as 20-ton excavators, dozers, wheel loaders, and graders—along the outer perimeter lanes. Hence, these wider lanes provide the space required for maneuvering large equipment safely.
Aerial Work Platforms: Park boom lifts and scissor lifts on flat, stable concrete or paved pads. Otherwise, soft ground causes tires or tracks to settle unevenly, which creates dangerous tip-over hazards during yard moves.
Seasonal and Standby Assets: Move off-season inventory, such as snow plows in summer or dewatering pumps in winter, into secondary overflow bays. Therefore, your prime corridors stay open for current high-demand items.
Grid Systems, Slotting, and Staging Lanes
Implementing a standardized grid system across outdoor storage zones eliminates confusion when tracking assets. For instance, divide outdoor bays into lettered aisles and numbered slots, like Aisle C, Bay 14. Mark these slots clearly with durable ground paint and high-visibility post signs.
When you integrate this grid into your equipment rental management software, staff can pinpoint machine locations instantly. These systems also improve inventory visibility, maintenance tracking, and equipment dispatch coordination.
Consequently, workers waste no time searching through large lots. Furthermore, staging lanes right next to storage grids allow attendants to pull, inspect, and group multi-item orders hours before customer pickup.
Beyond physical location labels, rental operators can use GPS tracking systems to monitor machinery movement, verify asset locations, and improve fleet security across large outdoor storage yards.
Rental Warehouse Organisation: Staging, Inspection, and Maintenance
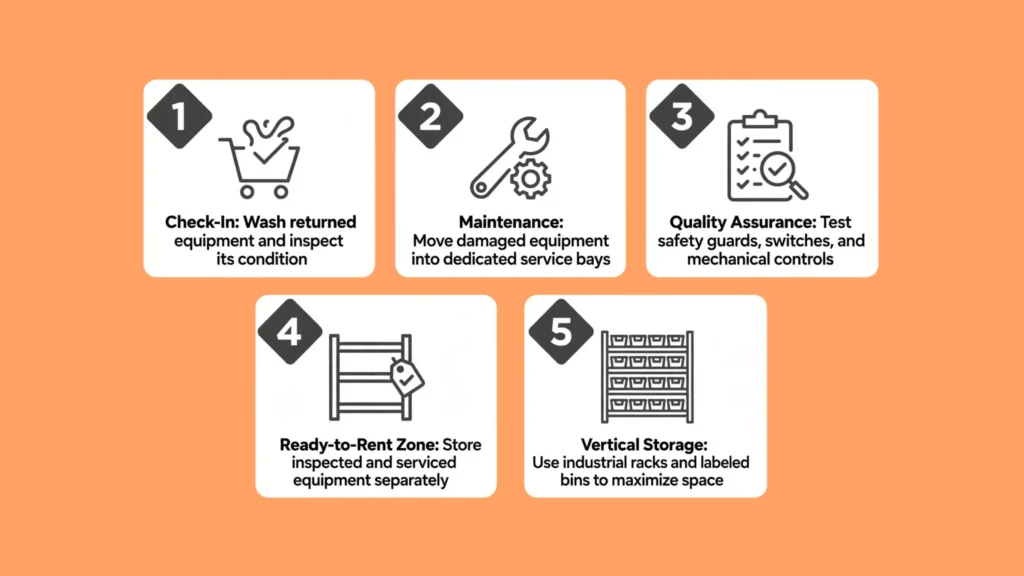
Indoor warehouse space requires meticulous planning because indoor square footage carries higher operating costs. Systematic rental warehouse organisation ensures that small tools, specialized attachments, power units, and repair bays work together seamlessly.
The Linear Workflow Process
Indoor operations should follow a simple step-by-step linear progression. This flow restores returned equipment to ready-to-rent status rapidly:
Check-In and Decontamination Zone: Returned tools enter through a dedicated wash bay and inspection station first. Here, technicians verify engine hours, check fuel levels, inspect external parts, and wash away heavy mud and grease.
Diagnostic and Maintenance Bays: Equipment requiring service or repairs moves directly into organized service bays. Therefore, equip these service areas with dedicated parts racks, overhead cranes, pneumatic tools, and fluid drainage lines to boost mechanical uptime.
Quality Assurance Staging: After servicing, technicians perform a mandatory safety check. This step confirms that all safety guards, switches, and mechanical controls operate perfectly.
Ready-to-Rent (RTR) Holding Area: Finally, staff transfer cleared tools and compact machines into clean, labeled industrial rack systems. Storing inventory in a dedicated RTR zone gives immediate visual proof that every item is ready for dispatch.
Vertical Racking and Tool Management
Maximizing vertical space is vital for efficient warehouse storage. Industrial pallet racking, cantilever racks for long materials, and vertical bin systems optimize storage for small tools, chainsaws, demo hammers, and pumps.
In addition, organize small tools by category with color-coded shelf tags and barcode labels. This keeps indoor environments clutter-free, prevents misplaced inventory, and shields sensitive electrical tools from moisture and impact damage.
Loading Area Design: Safety, Speed, and Staging
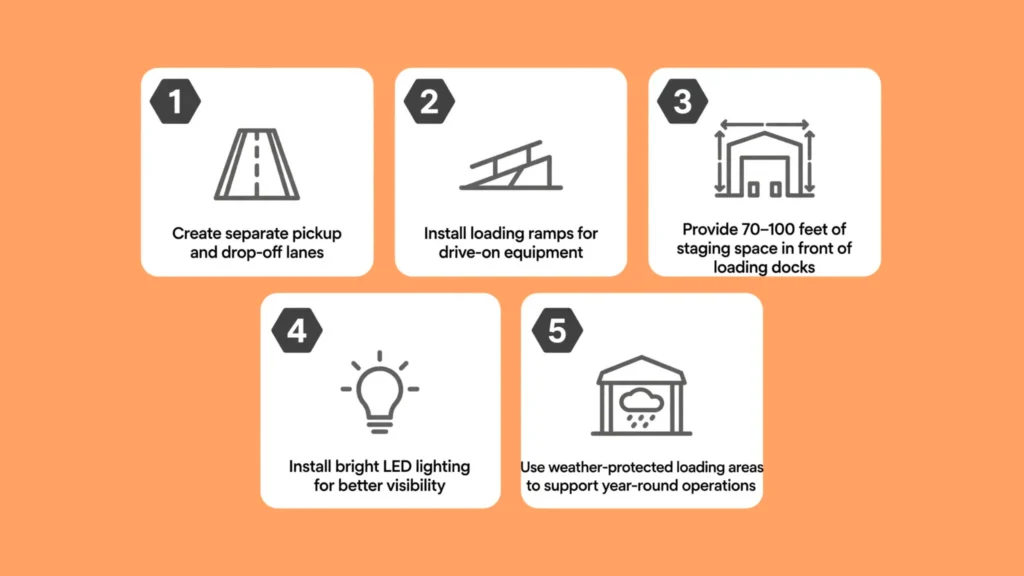
The loading and unloading zone represents the highest-risk environment in any equipment yard. This area serves as the main intersection where transport trucks, customer vehicles, heavy machinery, and ground staff meet constantly. Therefore, strategic loading area design balances rapid customer turnover with strict safety controls.
Structural Requirements of High-Performance Loading Zones
Dedicated Pickup and Drop-off Lanes: Build separate staging lanes for customer pickups and commercial transport drop-offs. Mixing small customer trailers with commercial lowboy transports creates traffic jams and increases side-swipe accidents.
Multi-Grade Loading Docks and Ramps: Build both recessed loading docks for semi-trailers and wide, low-incline ramps for drive-on equipment like scissor lifts and rollers.
Spacious Staging Aprons: Provide wide concrete aprons in front of loading docks—ideally 70 to 100 feet deep. Thus, long transport rigs align straight with the dock without blocking main yard lanes.
High-Visibility Lighting and All-Weather Cover: Install bright, non-glare LED lighting across loading bays for clear visibility during early morning dispatches. Additionally, cantilevered roof overhangs protect staff and electrical gear from harsh rain, ice, and sun.
Common Layout Mistakes to Avoid
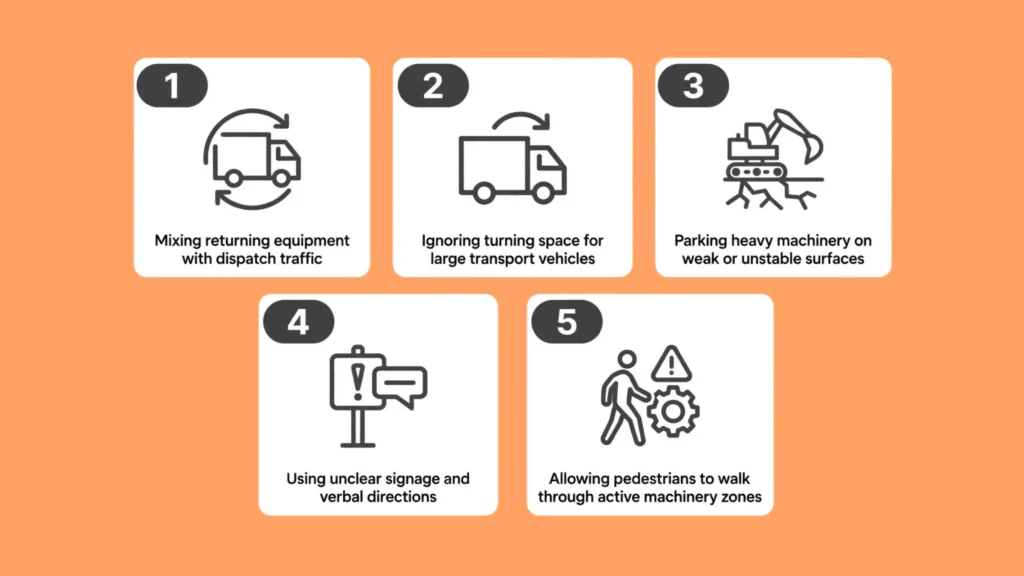
Mixing Return and Dispatch Traffic: Forcing returning equipment through your dispatch gates causes major bottlenecks during morning peak hours. Instead, keep inbound and outbound traffic paths separate.
Underestimating Equipment Turning Radiuses: Failing to leave enough space for large transport rigs leads to tight turns. Consequently, drivers scrape fences, damage equipment, and break yard structures.
Neglecting Ground Surface Integrity: Parking heavy tracked machinery on soft asphalt or dirt creates deep ruts, mud pools, and surface failures over time. Instead, build reinforced concrete pads for high-weight machinery.
Inadequate Yard Signage: Relying on verbal directions instead of clear signage confuses drivers and customers. As a result, confusion slows down overall yard output.
Frequently Asked Questions
What is the most efficient overall pattern for a rental yard layout?
A single-direction loop layout with drive-through loading lanes works best. It eliminates tricky reversing maneuvers, keeps transport traffic moving smoothly, and cleanly separates customer vehicles from internal machinery.
How much space should I allocate for heavy transport loading areas?
Commercial transport loading zones require at least 70 to 100 feet of straight-line clearance in front of docks or ramps. This space allows 48-foot to 53-foot flatbed trailers to pull in and park safely without blocking main drive lanes.
How should I organize small tools compared to heavy machinery?
Store small tools indoors on heavy-duty vertical racking, shelf bins, and cantilever systems near your service counter. Conversely, park heavy machinery outdoors in numbered, ground-painted grid slots organized by equipment type and rental popularity.
Why is a dedicated Ready-to-Rent (RTR) zone essential?
An RTR zone provides complete certainty that any machine parked there is fully washed, inspected, serviced, and prepped for work. Thus, it prevents staff from dispatching unserviced tools and avoids costly customer delays.
How does an optimized yard layout improve overall workplace safety?
An optimized layout boosts safety by physically separating walking paths from machinery lanes. Furthermore, it removes blind spots, provides bright LED lighting in loading zones, and reduces dangerous vehicle reversing through one-way traffic loops.
Final Thoughts
Optimizing a rental yard layout requires continuous evaluation of workflows, inventory types, and safety controls. By building an accessible equipment storage layout, maintaining organized warehouse space, and investing in a smart loading area design, equipment rental providers can significantly improve operational efficiency. Ultimately, these smart space choices protect fleet assets, reduce workplace accidents, and deliver an outstanding customer experience every day.
About The Author