Best Pumpkin Pie Recipe for a Classic Holiday Treat

A classic holiday dessert should feel special without making the baker spend the whole day at the counter. This best pumpkin pie recipe gives you a creamy, warmly spiced holiday treat with a simple filling and clear steps. You can use canned pumpkin or homemade purée, depending on your time and taste.
Blind baking means baking an empty pie crust before adding its filling. This recipe keeps the work approachable, whether you are baking for a family dinner or bringing dessert to a holiday gathering. You will have time to prepare the crust, mix the filling, and let the oven do the rest. Plan enough time for the pie to cool before slicing so its custard can settle.
Key Takeaways
- Pure pumpkin gives you control over sweetness.
- A 9-inch crust fits the main filling formula.
- Mix gently to keep extra air out of the custard.
- Cool the pie before cutting clean slices.
- Use a tested recipe if changing the dairy or sugar.
What Goes Into This Easy Pumpkin Pie?
You can build this filling from a short grocery list and one mixing bowl. Condensed milk supplies both sweetness and richness, so you do not need to add sugar separately. This easy pumpkin pie recipe uses pure pumpkin, not presweetened pie mix.
A pumpkin pie recipe with condensed milk follows the Eagle Brand pumpkin pie style: a smooth custard with a familiar mix of warm spices. Use a 9-inch pie crust, and keep the eggs and spices measured before mixing. That small bit of setup makes the bowl work quick and tidy.
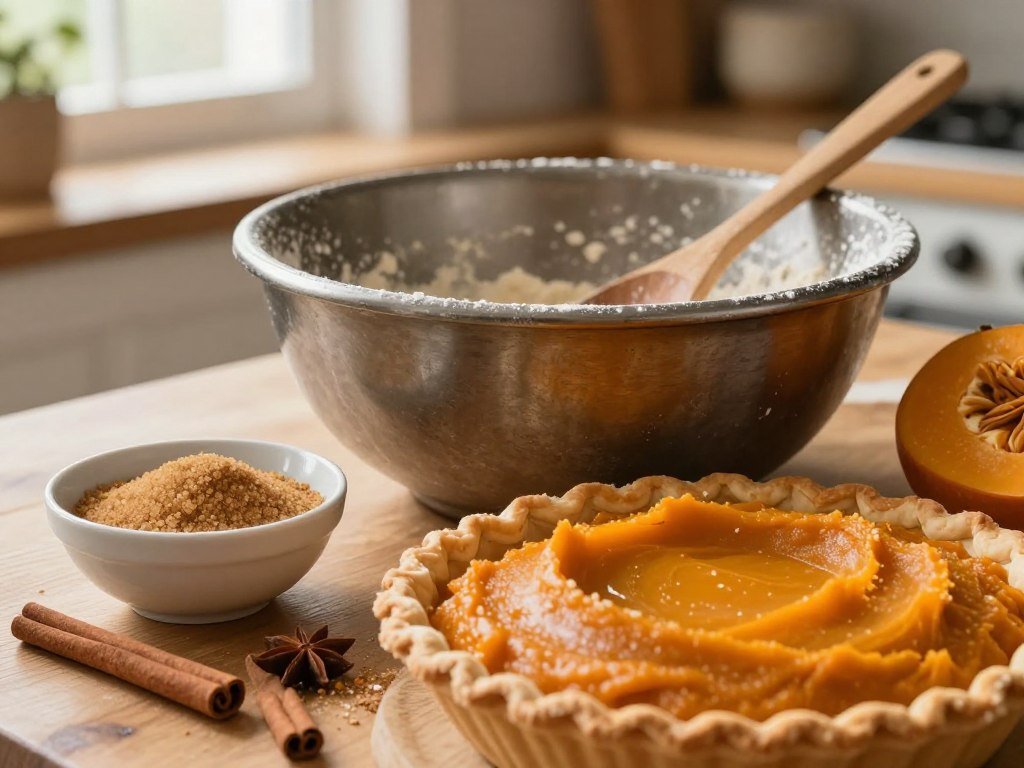
Gather the filling ingredients
Set out these ingredients before you start. The crust should be unbaked when you fill it.
- One 15-ounce can pumpkin purée, about 2 cups
- One 14-ounce can sweetened condensed milk
- Two large eggs
- One teaspoon ground cinnamon
- One-half teaspoon ground ginger
- One-half teaspoon ground nutmeg, one-half teaspoon salt, and one unbaked 9-inch pie crust
The Eagle Brand filling formula uses condensed milk instead of separate sugar and milk. That gives the custard a rich texture, with sweetness already built in. If you buy canned pumpkin, choose plain pumpkin purée rather than a can labeled pumpkin pie mix.
Mix a smooth, balanced filling
Beat the eggs in a large bowl, then add the pumpkin, condensed milk, cinnamon, ginger, nutmeg, and salt. Whisk until the ingredients are combined and the color looks even. Stop once the filling is smooth; whipping adds air that can puff during baking.
Use pure pumpkin and whisk only until the filling comes together. Presweetened pie mix changes the recipe’s balance.
Scrape the can well so the full measure of condensed milk goes into the bowl. A flexible spatula helps collect the thick milk clinging to the sides. The final mixture should pour in a steady ribbon, not feel foamy or whipped.
How Do Pumpkin Pie Recipes Differ?
The biggest difference between classic pumpkin pie recipes is whether sweetness comes from sugar added separately or condensed milk. Each formula balances its dairy, eggs, and spices as a whole. Choose by the ingredients you have, then follow that recipe’s full method.
Libby’s pumpkin pie recipe should use pure pumpkin rather than pie mix. Betty Crocker also recommends canned pumpkin, and says 1 3/4 cups cooked pumpkin equals one 15-ounce can. Betty Crocker’s recipe serves eight and was updated on September 30, 2026.
| Recipe | Pumpkin and sweetener | Dairy | Distinguishing detail |
|---|---|---|---|
| Carnation Classic | 1 3/4 cups pumpkin purée; 1 cup packed brown sugar | Evaporated milk | Uses 2 tablespoons flour and includes cloves |
| Betty Crocker | Canned pumpkin; 1 3/4 cups cooked pumpkin equals one 15-ounce can | See full recipe formula | Serves 8; advises against pumpkin pie mix |
| Inspired Taste | 15-ounce can purée or 1 3/4 cups homemade; 1/2 cup granulated and 1/3 cup light brown sugar | 3/4 cup heavy cream | Bakes at 425°F for 15 minutes, then 375°F |
Carnation Classic uses 2 eggs, flour, cinnamon, ginger, nutmeg, cloves, salt, and evaporated milk. Its Canadian pumpkin pie recipe example uses brown sugar and evaporated milk, while the Eagle Brand formula uses condensed milk. Carnation bakes at 350°F for 60-70 minutes in the oven’s bottom third.
Inspired Taste adds 3 eggs, vanilla, spices, and salt to its filling. RecipeTin Eats uses 1 3/4 cups purée, 2/3 cup sugar, 1 1/3 cups cream, and 3 eggs, then heats pumpkin and spices on the stove for five minutes. Choose a recipe as a complete formula rather than swapping its dairy and sweetener without adjusting the rest.
Should You Blind-Bake the Pie Crust?
A wet custard filling is the main reason a homemade crust may benefit from a short head start in the oven. Blind baking means baking an empty pie crust before adding filling. A partially baked homemade crust can help prevent a soggy bottom.
For a quick option, a refrigerated store-bought crust can go straight to filling in the Cooking Classy method. Frozen crusts need to thaw as their package directs. A homemade pie crust takes longer, though the extra step can help its base hold up under custard.

Store-bought crust options
| Crust type | Before filling | Baking detail |
|---|---|---|
| Refrigerated store-bought crust | No blind bake in the easy method | Add filling to the prepared crust |
| Frozen store-bought crust | Thaw as package directs | Follow package baking directions |
| Homemade crust | Chill, then bake empty with weights | 9-inch crust: 25-35 minutes with weights, then 10-15 without |
Betty Crocker’s homemade crust method covers the edges with a double thickness of foil for 10 minutes. Remove the foil, then bake the shell for 2-4 minutes longer. This shorter method gives the crust a head start without the longer weighted bake.
Homemade crust preparation
For the longer method, chill the shaped dough for 30 minutes before baking. Line it with parchment and add pie weights, dried beans, or another oven-safe weight. Iowa State Extension’s blind-baking guidance also describes docking dough and weighing it down.
A deep dish can hold more filling than a shallow shell, so check the crust’s shape before you pour. Do not force the whole batch into a shell that looks too small. Let a prebaked shell cool enough to handle, then add the filling without delay.
Can You Use Fresh Pumpkin Purée?
Canned pumpkin is the simplest route to a consistent filling, while fresh purée gives the baker control over the preparation. Either option can work in homemade pumpkin pie when measured carefully. Fresh pumpkin pie results depend on removing excess water before mixing.
Betty Crocker equates 1 3/4 cups cooked pumpkin with one 15-ounce can. That volume is a useful guide when a recipe calls for a can. Homemade pumpkin purée can be less dense or more watery than canned, so drain it before measuring your final filling.

Canned pumpkin for a consistent result
Canned pumpkin saves peeling, roasting, and draining time. Read the label and choose plain pumpkin purée, not sweetened pie mix. The can gives you an easy volume to measure, which helps keep the filling close to its tested balance.
| Purée option | Preparation | Time or measure | Key handling |
|---|---|---|---|
| Canned pumpkin | Open and stir before measuring | 15-ounce can equals about 1 3/4 cups cooked pumpkin | Choose plain pumpkin purée |
| Roasted pumpkin halves | Roast cut halves at 400°F | About 35-40 minutes, until fork-tender | Scoop flesh, then drain excess water |
| Roasted pumpkin pieces | Roast pieces at 350°F | About 45 minutes, until fork-tender | Use sugar pumpkin; squash also works |
Prepare and drain homemade purée
For a halves-roasting method, cut the pumpkin in half and roast it at 400°F until a fork slides into the flesh. Another method roasts pumpkin pieces at 350°F for about 45 minutes. These are distinct approaches, not one shared temperature rule.
Once cooked, scoop or peel away the flesh and blend it until smooth. Transfer the purée to a sieve or colander and drain it for about 20 minutes. Draining helps keep extra water from loosening the custard.
You can also steam cut pumpkin pieces instead of roasting them. Homemade purée keeps in an airtight container in the refrigerator for up to five days. Measure the purée by volume and drain it before it goes into the filling.
How to Make the Best Pumpkin Pie Recipe
Once the crust is ready, the recipe comes down to a gentle mix and a two-stage bake. The change is simple: the pie stays in the oven while the temperature drops. Use 425°F for 15 minutes, then lower the oven to 350°F for 35-40 minutes.
Set the filled crust on a baking sheet before it goes into the oven. That makes the pie easier to carry and catches any spills. The lowest rack is useful for the Cooking Classy method, especially when you want heat near the bottom crust.
Combine the filling gently
Keep your mixing light and stop once the filling looks even. Pour slowly into the prepared pie crust, leaving a little room at the top. If the crust is already on the baking sheet, you will not need to carry a full pie across the kitchen.
Bake in two stages
- Mix the filling gently in a bowl until the ingredients are combined.
- Pour the mixture into the prepared pie crust and place it on a baking sheet.
- Bake at 425°F for 15 minutes.
- Lower the oven to 350°F and bake for 35-40 minutes more.
The two temperatures belong to Eagle Brand’s Perfect Pumpkin Pie method. Lower the oven setting without taking the pie out. The gradual change lets the custard continue baking in the same spot.
Keep the oven door shut during the temperature change so the pie continues baking steadily. Opening it lets heat escape and can slow the bake. Set a timer for the second stage, then check the filling near the end of that range.
How Can You Tell When the Filling Is Set?
A pumpkin pie can be ready before its center looks completely motionless. Use the test that matches your recipe, since custards can finish with a slight wobble. For Eagle Brand’s pie, a knife inserted 1 inch from the crust should come out clean.
Do not put that knife into the center for this test. The edge area cooks sooner, so the right spot gives you a useful check without cutting through the middle. Let the pie cool before serving.
Use a visual or knife check
Follow the recipe’s stated cue rather than mixing several methods together. Eagle Brand’s clean-knife test checks the custard about an inch in from the crust. Other custard recipes may tell you to look for a slight wobble at the center.
A little motion does not always mean the filling is raw. Some custards firm as they cool, so pulling them when the center still moves slightly can prevent a dry result. The wobble should be small, not a wave across the whole surface.
Check the center temperature
An instant-read thermometer gives you another clear way to check. Key To My Lime gives 175°F as the center reading for a done pumpkin pie. Insert the probe into the center without touching the crust or pan.
The egg doneness guide gives 160°F for baked custards and similar dishes, while the 175°F reading is specific to this pumpkin pie guidance. Match the target to the recipe you are making instead of treating both numbers as one rule. If the knife still carries wet filling, return the pie to the oven and check it again.
How Do You Prevent Cracks in Pumpkin Pie?
Most cracks begin when the filling puffs too quickly or traps too much air. Gentle mixing and a timely oven check can help limit both problems. Pull the pie before its center becomes fully firm if your recipe calls for a slight wobble.
Eggs help the filling set, but vigorous mixing can leave bubbles that show on top. Use a light hand and follow the recipe’s own doneness cue. Small cracks do not make the dessert a failure.
Keep air out of the filling
Use these simple checks while you mix and bake:
- Add eggs one at a time.
- Avoid vigorous whisking after adding the eggs.
- Tap the bowl gently to release trapped bubbles.
- Remove the pie before the center turns fully firm.
Bon Appétit’s formula uses 3 eggs plus 1 egg yolk and 2 cups pumpkin purée. It bakes at 325°F for 60-75 minutes, until the center wobbles. That lower-temperature schedule belongs to Bon Appétit’s separate recipe, not the Eagle Brand schedule.
Avoid overbaking and handle small cracks
Use the bake time and doneness sign for the formula in your bowl. A small crack can happen even when you follow the method closely. Cover it with whipped cream when you serve the pie, rather than trying to patch the warm custard.
Do not judge the surface while the pie is still hot and puffed. The filling settles as it cools, and a shallow line may look less noticeable afterward. Let the pie settle on a rack before deciding whether a small surface crack needs any attention.
How Can You Adjust the Spice Blend?
Cinnamon leads the flavor, while ginger, nutmeg and cloves give the filling its familiar autumn warmth. Separate spices let you tune one flavor without changing the others. Keep the recipe’s salt and sweetener amounts unchanged when you adjust only the spices.
Use less clove if you prefer a softer, less sharp finish. Add a little more cinnamon for a rounder flavor, or raise the ginger for extra warmth. Small changes are easier to judge than a large shift in the mixture.
Use individual spices
Measure cinnamon, ginger, nutmeg, and cloves on their own when you want control over each note. Their flavors are not identical, so a single blend can make it harder to adjust just one. Start with the amounts in your recipe, then make a small change next time.
Spice can taste stronger before baking than after the custard has set. Keep a note of any change you make, especially if you are baking for guests with different tastes. A measured approach helps you repeat a blend you enjoy.
Substitute a prepared pumpkin spice blend
You can make a simple pumpkin spice blend with 1 1/2 teaspoons cinnamon, 1/2 teaspoon nutmeg, 1/4 teaspoon ginger, and 1/4 teaspoon cloves. Use it as an alternative to the individual spices, not as an extra layer on top of them.
Check the spice blend’s ingredients if you use a store-bought jar. Some blends include other spices, so the flavor may differ from this simple mix. Change one spice at a time so the next pie makes it clear which adjustment you prefer.
How Long Does Pumpkin Pie Keep?
Let the custard cool fully before wrapping or covering the pie. Betty Crocker’s guidance gives about two hours on a rack for complete cooling. Its leftovers keep up to four days in the refrigerator or one month in the freezer.
Cooling times differ by recipe: RecipeTin Eats recommends at least four hours before cutting its pie. Inspired Taste allows the pie to sit at room temperature for two hours. Treat that as a serving window, not a way to store leftovers.
- Cooling: Betty Crocker recommends about 2 hours on a rack.
- Room temperature: Inspired Taste allows up to 2 hours for serving.
- Refrigerator: Betty Crocker gives a limit of up to 4 days.
- Freezer: Betty Crocker gives a limit of up to 1 month.
Wait until the pie has cooled before covering it, so trapped heat does not build up under the wrap. Keep refrigerated portions covered between servings. If you plan to freeze leftovers, divide them into portions that are easy to thaw.
Cool the pie before serving
A warm custard can slump when you cut it, so give it time to set. Betty Crocker’s cooling window is about two hours on a rack, while RecipeTin Eats calls for at least four hours before slicing. Follow the timing for your recipe rather than blending the two instructions.
Refrigerate or freeze leftovers
Inspired Taste’s two-hour room-temperature limit is for serving, not storage. For the Betty Crocker limits, refrigerate leftovers for up to four days or freeze them for up to one month. Wrap or cover the pie once it is cool.
Freeze slices flat in a covered container, or wrap a whole pie well to protect it from freezer air. Thaw it in the refrigerator before serving. Label a frozen portion with the date so it is used within its one-month storage window.
What Should You Serve With Pumpkin Pie?
A slice needs little more than a spoonful of whipped cream to feel ready for the holiday table. A light topping lets the spice and pumpkin stay in focus. A pie baked one day ahead can be chilled, then served warm or at room temperature.
Add a light dusting of cinnamon or nutmeg if you want a little extra aroma. Keep the topping simple, especially after a large holiday meal. You can offer whipped cream on the side so each person chooses how much to add.
Add a simple topping
Whipped cream is an easy match for the smooth custard and warm spices. A small spoonful softens each bite without covering the pie’s flavor. For a neat finish, add the cream just before serving.
Ground cinnamon or nutmeg gives the topping a festive look and a little more spice. Use a fine dusting, not a thick layer. If the pie is already rich, a plain cream topping works just as well.
Plan the pie ahead
Bon Appétit’s recipe makes one 9-inch pie and can be baked one day ahead, then chilled. It can be served warm or at room temperature. That gives you a useful option when the oven is full on a holiday.
Keep the plan flexible if refrigerator space is tight. A covered pie can wait chilled until serving, then warm briefly if that suits your meal. If the oven is busy, serve it at room temperature instead.
For home bakers who hope to sell desserts, check local cottage food laws and plan packaging before taking orders. A guide to starting a dessert business can help you think through product choice and customer demand. Set out only the slices you expect to serve and keep the remaining pie covered.
Keep the topping light, and choose a serving temperature that fits the space and time you have.
Conclusion
A dependable holiday pie starts with a filling that is simple to mix and easy to check. Pure pumpkin, a gentle hand with the filling, and an unhurried cooling period are the practical keys to a satisfying result. They help the custard set well and make serving easier.
Choose the crust that fits your schedule, then follow one complete recipe instead of swapping its core ingredients. Pick your crust, gather the ingredients and give the pie enough time to cool before the first slice.
FAQ
Can I use a 10-inch pie crust with the same amount of filling?
Yes, but check the 10-inch shell’s depth and capacity before pouring in the filling. The main formula is designed for a 9-inch crust, so a wider shell may leave a thinner layer. Add the filling gradually and stop before it reaches the rim. Extra filling can be baked separately in a small oven-safe dish.
Can I replace sweetened condensed milk with evaporated milk one-for-one?
No, evaporated milk is unsweetened, so it cannot replace condensed milk in the same amount without changing the result. Condensed milk brings both sugar and a thick, rich texture to the filling. Use a complete recipe made for evaporated milk and added sugar instead. That keeps the dairy, sweetener, eggs, and baking method in balance.
Can I double the filling to bake two pies?
Yes, double the filling and use two pie shells. Divide the mixture evenly so both crusts hold the same amount, then bake each pie according to the recipe’s timing and doneness cues. If both pies share an oven, leave space for air to move around them. Check each pie on its own because they may finish at different times.
Can pumpkin purée be measured by weight instead of volume?
For this recipe, measure pumpkin purée by volume. Fresh and canned purée can differ in density and water content, so the same weight may not give the same amount of pumpkin. Stir the purée before measuring, then fill the measuring cup without packing it down. Drain homemade purée first if it looks loose or watery.
Can I freeze an unbaked pumpkin pie?
For the best custard texture, bake and cool the pie before freezing it. An unbaked custard can change in texture as it thaws and bakes. Wrap the cooled pie tightly, then thaw it in the refrigerator before serving. You can also freeze individual slices, which are easier to thaw when you want a small dessert.
Why does homemade pumpkin purée make a watery pie?
Homemade pumpkin purée can hold extra water, which loosens the filling and may keep it from setting as expected. Drain fresh purée in a sieve or colander before mixing it into the custard. About 20 minutes of draining can remove excess liquid. Measure the purée after draining so the recipe gets the intended volume.
About The Author